Here is a step-by-step guide to uploading menus and photos to your Google Business Profile (GBP):
Uploading Menus to Google Business Profile
-
Sign in to your Google Business Profile
Use your Google account that has manager or owner access to your business profile. -
Go to your Business Profile dashboard
You can access this by searching your business name on Google or visiting business.google.com and selecting your business. -
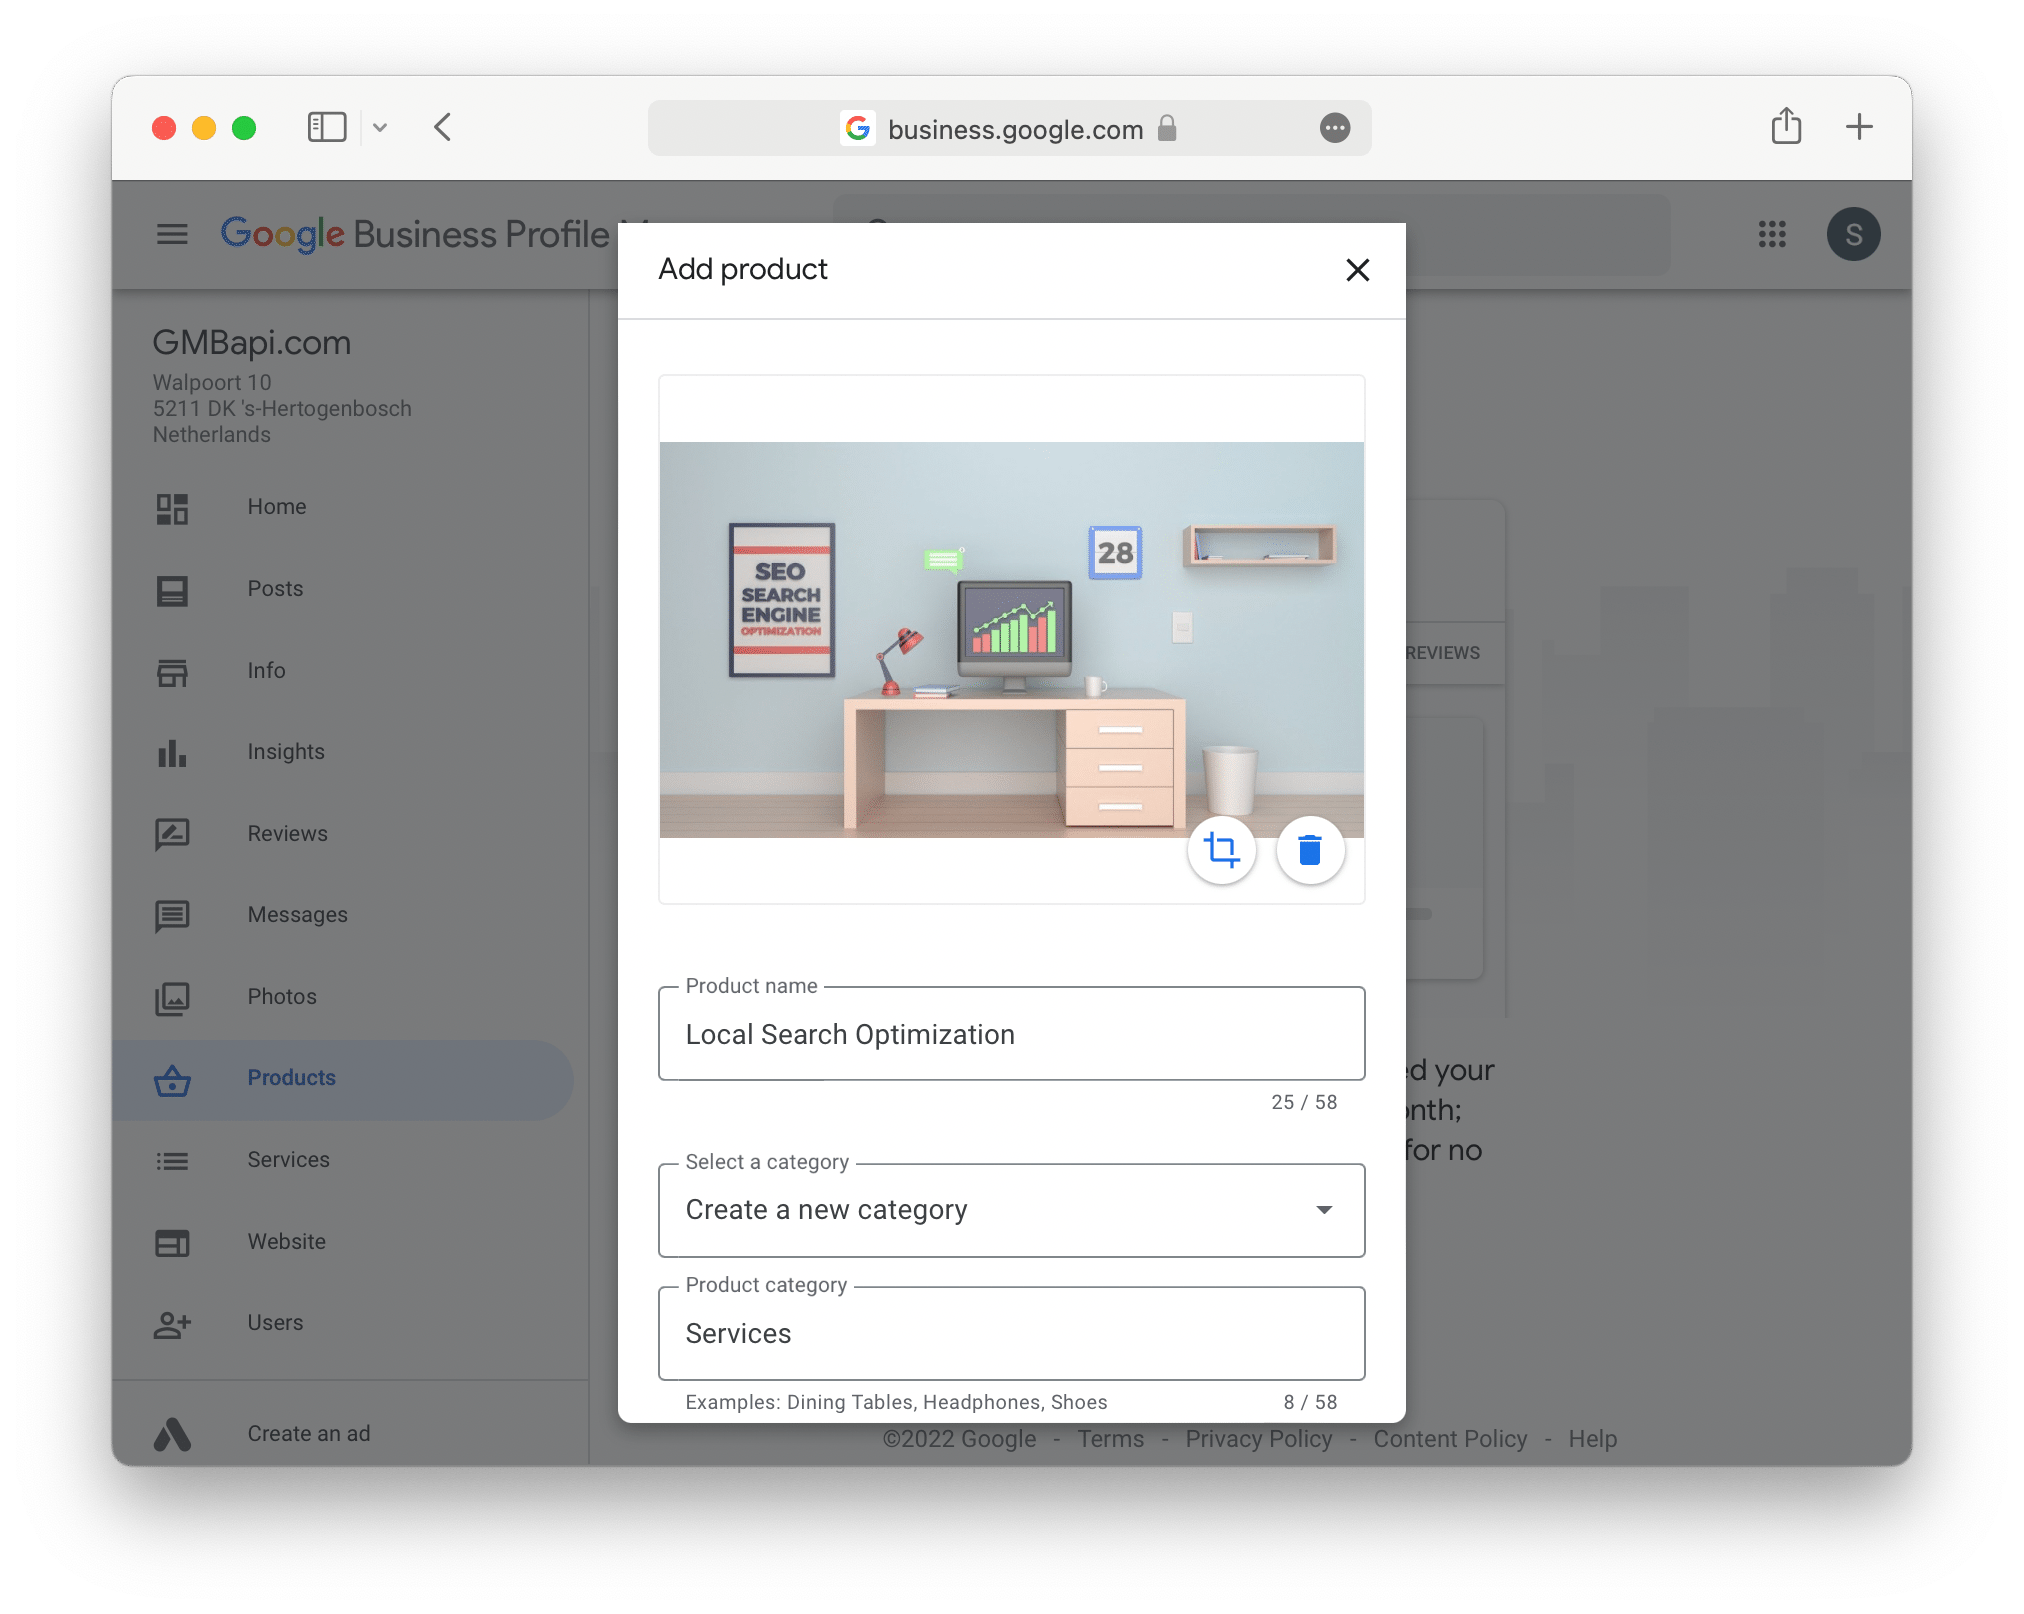
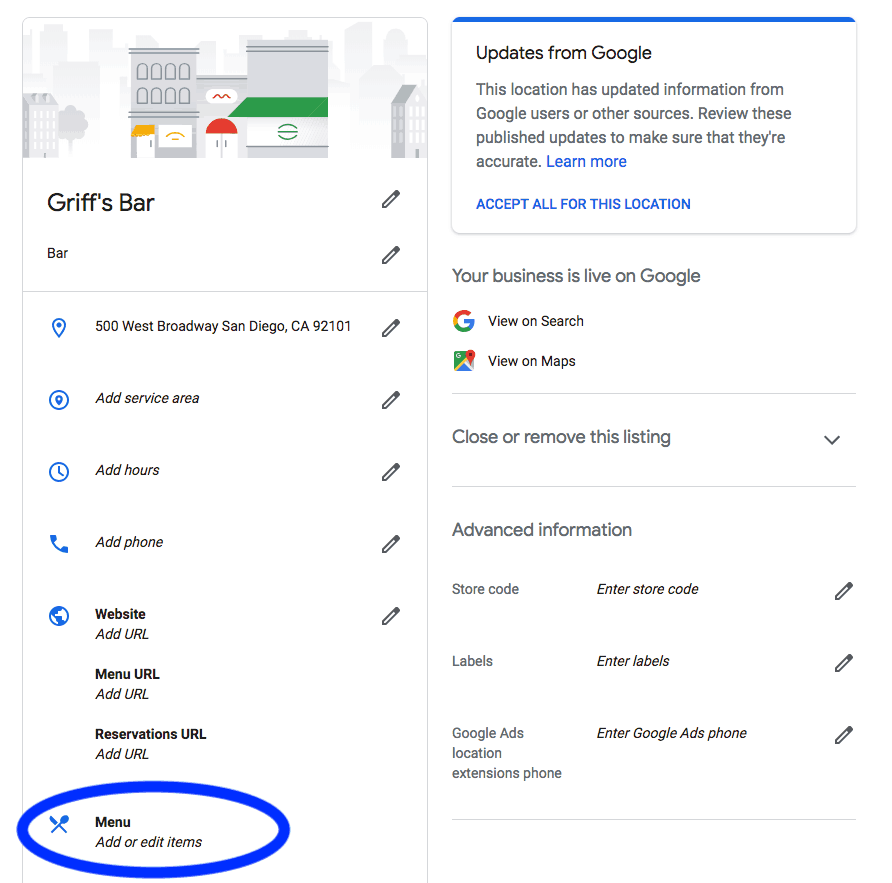
Select "Edit menu"
This option allows you to manage your restaurant’s menu directly within your profile. -
Upload menu photos or PDFs
- Click on Photos of menu at the top.
- Use Select photos or a PDF to upload your menu file from your device. You can drag and drop files as well.
- Alternatively, you can take a high-resolution photo of your physical menu and upload it.
-
(Optional) Use Google’s AI menu generation feature
- After uploading a high-res menu photo, select Generate a menu.
- Google’s AI will extract menu items, descriptions, and prices from the image.
- Review and edit the extracted menu for accuracy before publishing.
Note: This feature is experimental and may not be available in all regions.
-
Publish your menu
Once you confirm the menu details, publish it to your profile so customers can view it.
Uploading Photos to Google Business Profile
-
Sign in to your Google Business Profile account
Use the Google account linked to your business. -
Navigate to the Photos section
- On desktop, go to your Business Profile dashboard and click the Photos tab on the left menu.
- On mobile, open the Google Maps app, tap Business, then tap More > Add photo to upload photos.
-
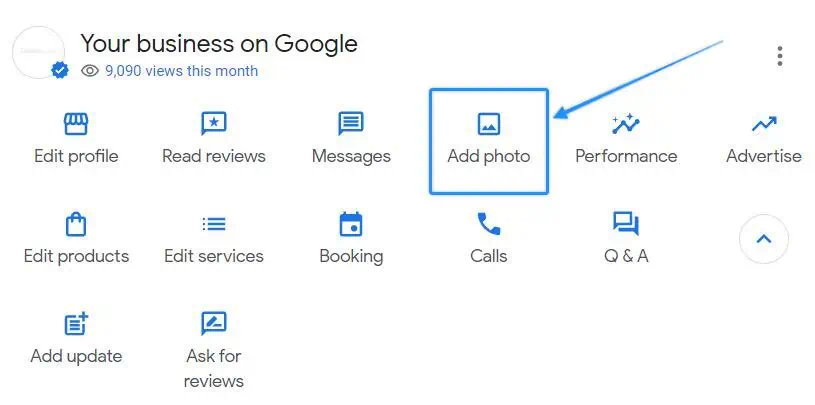
Add photos
- Click or tap Add photo or Add photos.
- Select photos from your device or drag and drop them.
- Upload photos such as cover photo, logo, interior, exterior, team, products, and menu photos to showcase your business effectively.
-
Optimize photo types
- Cover photo: The main image shown in search results; should be high-quality and representative of your business.
- Profile photo: Usually your logo, appears next to your business name.
- Additional photos: Show your products, team, and environment to attract customers.
-
Arrange and manage photos
- You can delete old photos and upload new ones to keep your profile fresh.
- Set your preferred cover photo by deleting the current one and uploading a new image.
-
Photo guidelines
- Use JPG or PNG format, size between 10 KB and 5 MB, recommended resolution around 720 px tall.
- Photos should be authentic and high quality, avoiding heavy editing or misleading images.
Summary Table
| Task | Steps | Tips |
|---|---|---|
| Upload Menu | Sign in > Edit menu > Photos of menu > Upload photo/PDF > (Optional) Generate menu AI > Publish | Use high-res photos; review AI-generated menu carefully |
| Upload Photos | Sign in > Photos tab > Add photo > Select/upload images | Prioritize cover photo, logo, interior, exterior, team, and product photos |
| Manage Photos | Delete old photos > Upload new ones > Set cover photo | Keep photos authentic and high quality; follow size and format guidelines |
This process ensures your Google Business Profile is visually appealing and informative, helping attract more customers.